Saddle Fit Tips 1 and 2 – Saddle Balance and Wither Clearance
Further to my last two blogs concerning the rather superficial summaries on the 9 points of saddle fit and getting ready for the spring and the upcoming show season, my next couple of weeks of blogs are going to be discussion of these 9 points in much more detail. Not only what to look for and how to recognize the issues, but why to fix them and why this is so crucial to the overall health and well-being (and performance!) of your horse.
Saddle Balance – Tip 1
Balance problems are usually very easy to diagnose and fairly simple to remedy. Have you ever experienced any of these problems which may indicate saddle balance problems?
“Help! I Can’t get out of this Chair Seat!”
Do you feel you are falling backward in the saddle?
Do you ride with your legs pulled up?
Are your shoulders rolled forward?
Are you hunched over your leg to balance?
If your saddle is too high in the pommel and too low in the cantle, this causes a lot of pressure on the horse’s back. It will be very difficult for your horse to engage his back because too much of your weight is on his last 2 floating ribs.
Your horse won’t go forward?
Are you leaning back to balance?
If your saddle is too low in the front it will pinch into the horse’s shoulder – which is very restrictive for your horse. Your saddle is too high in the back so you lift your leg and fall into a chair seat to balance which can strain the discs in your lower back.
Steps to check Saddle Balance:
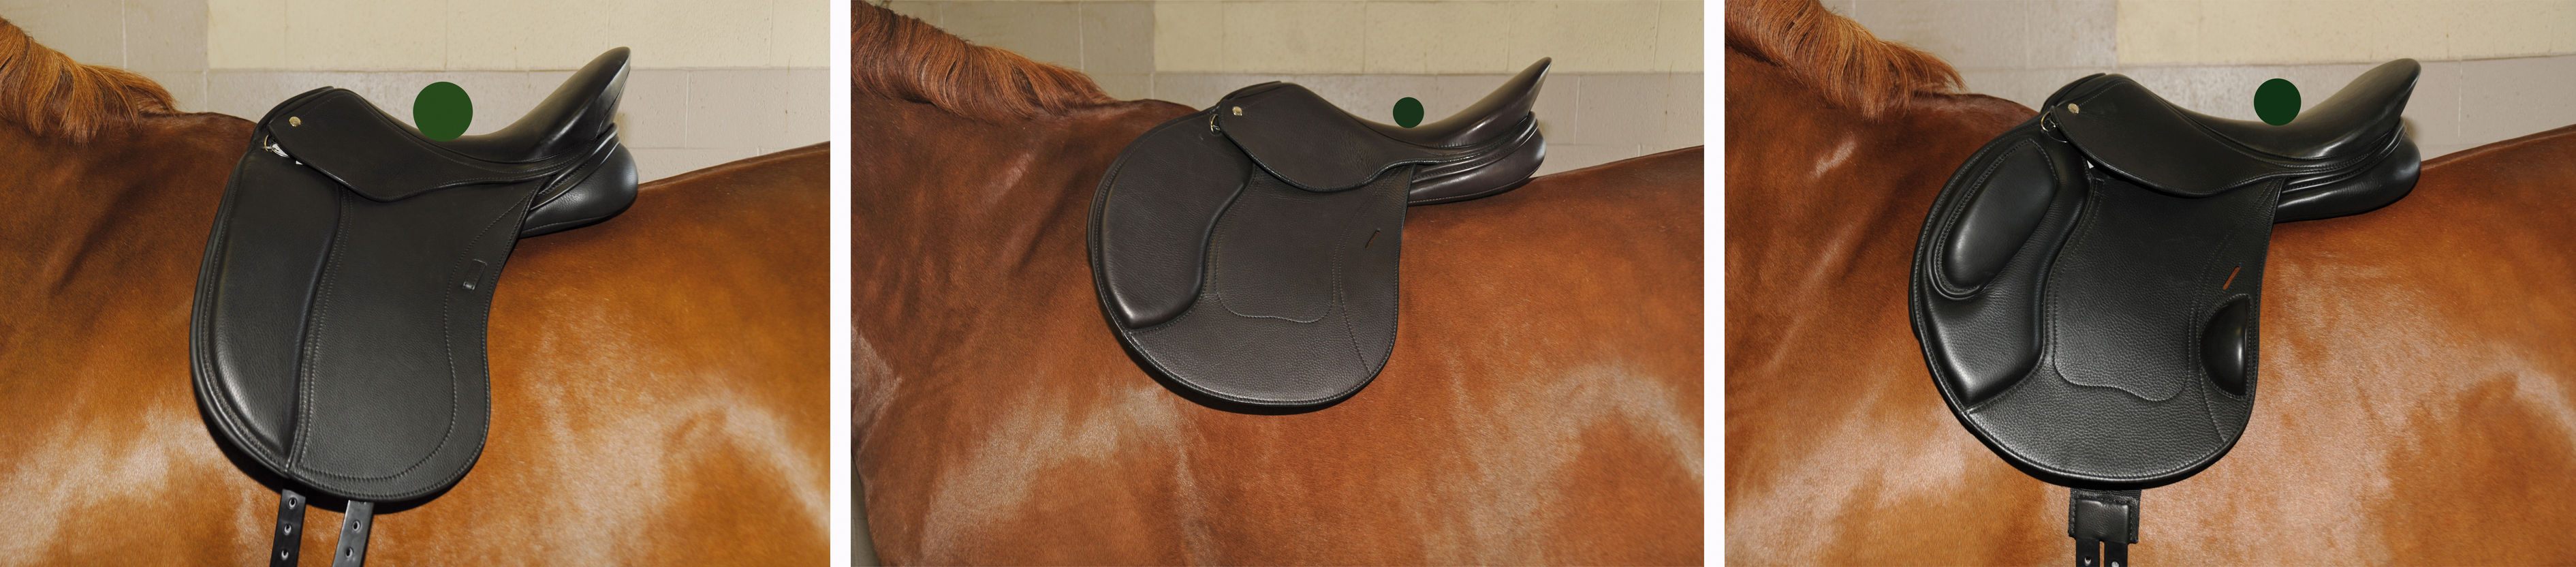
- Remove your saddle pad and irons. Place your saddle over the withers and slide it right back behind the shoulder blade. On a dressage saddle, the cantle should be a little higher than the pommel.
- Take a small round object (like a pencil) that will roll. Place it on the seat of the saddle and observe. If the saddle is balanced the pencil should rest in the center of the seat. If it rolls too far forward – the pommel is too low (cantle too high). If it rolls too far back, the saddle is too low in the cantle (pommel too high). It will be very difficult in either of these situations for both horse and rider to balance properly.
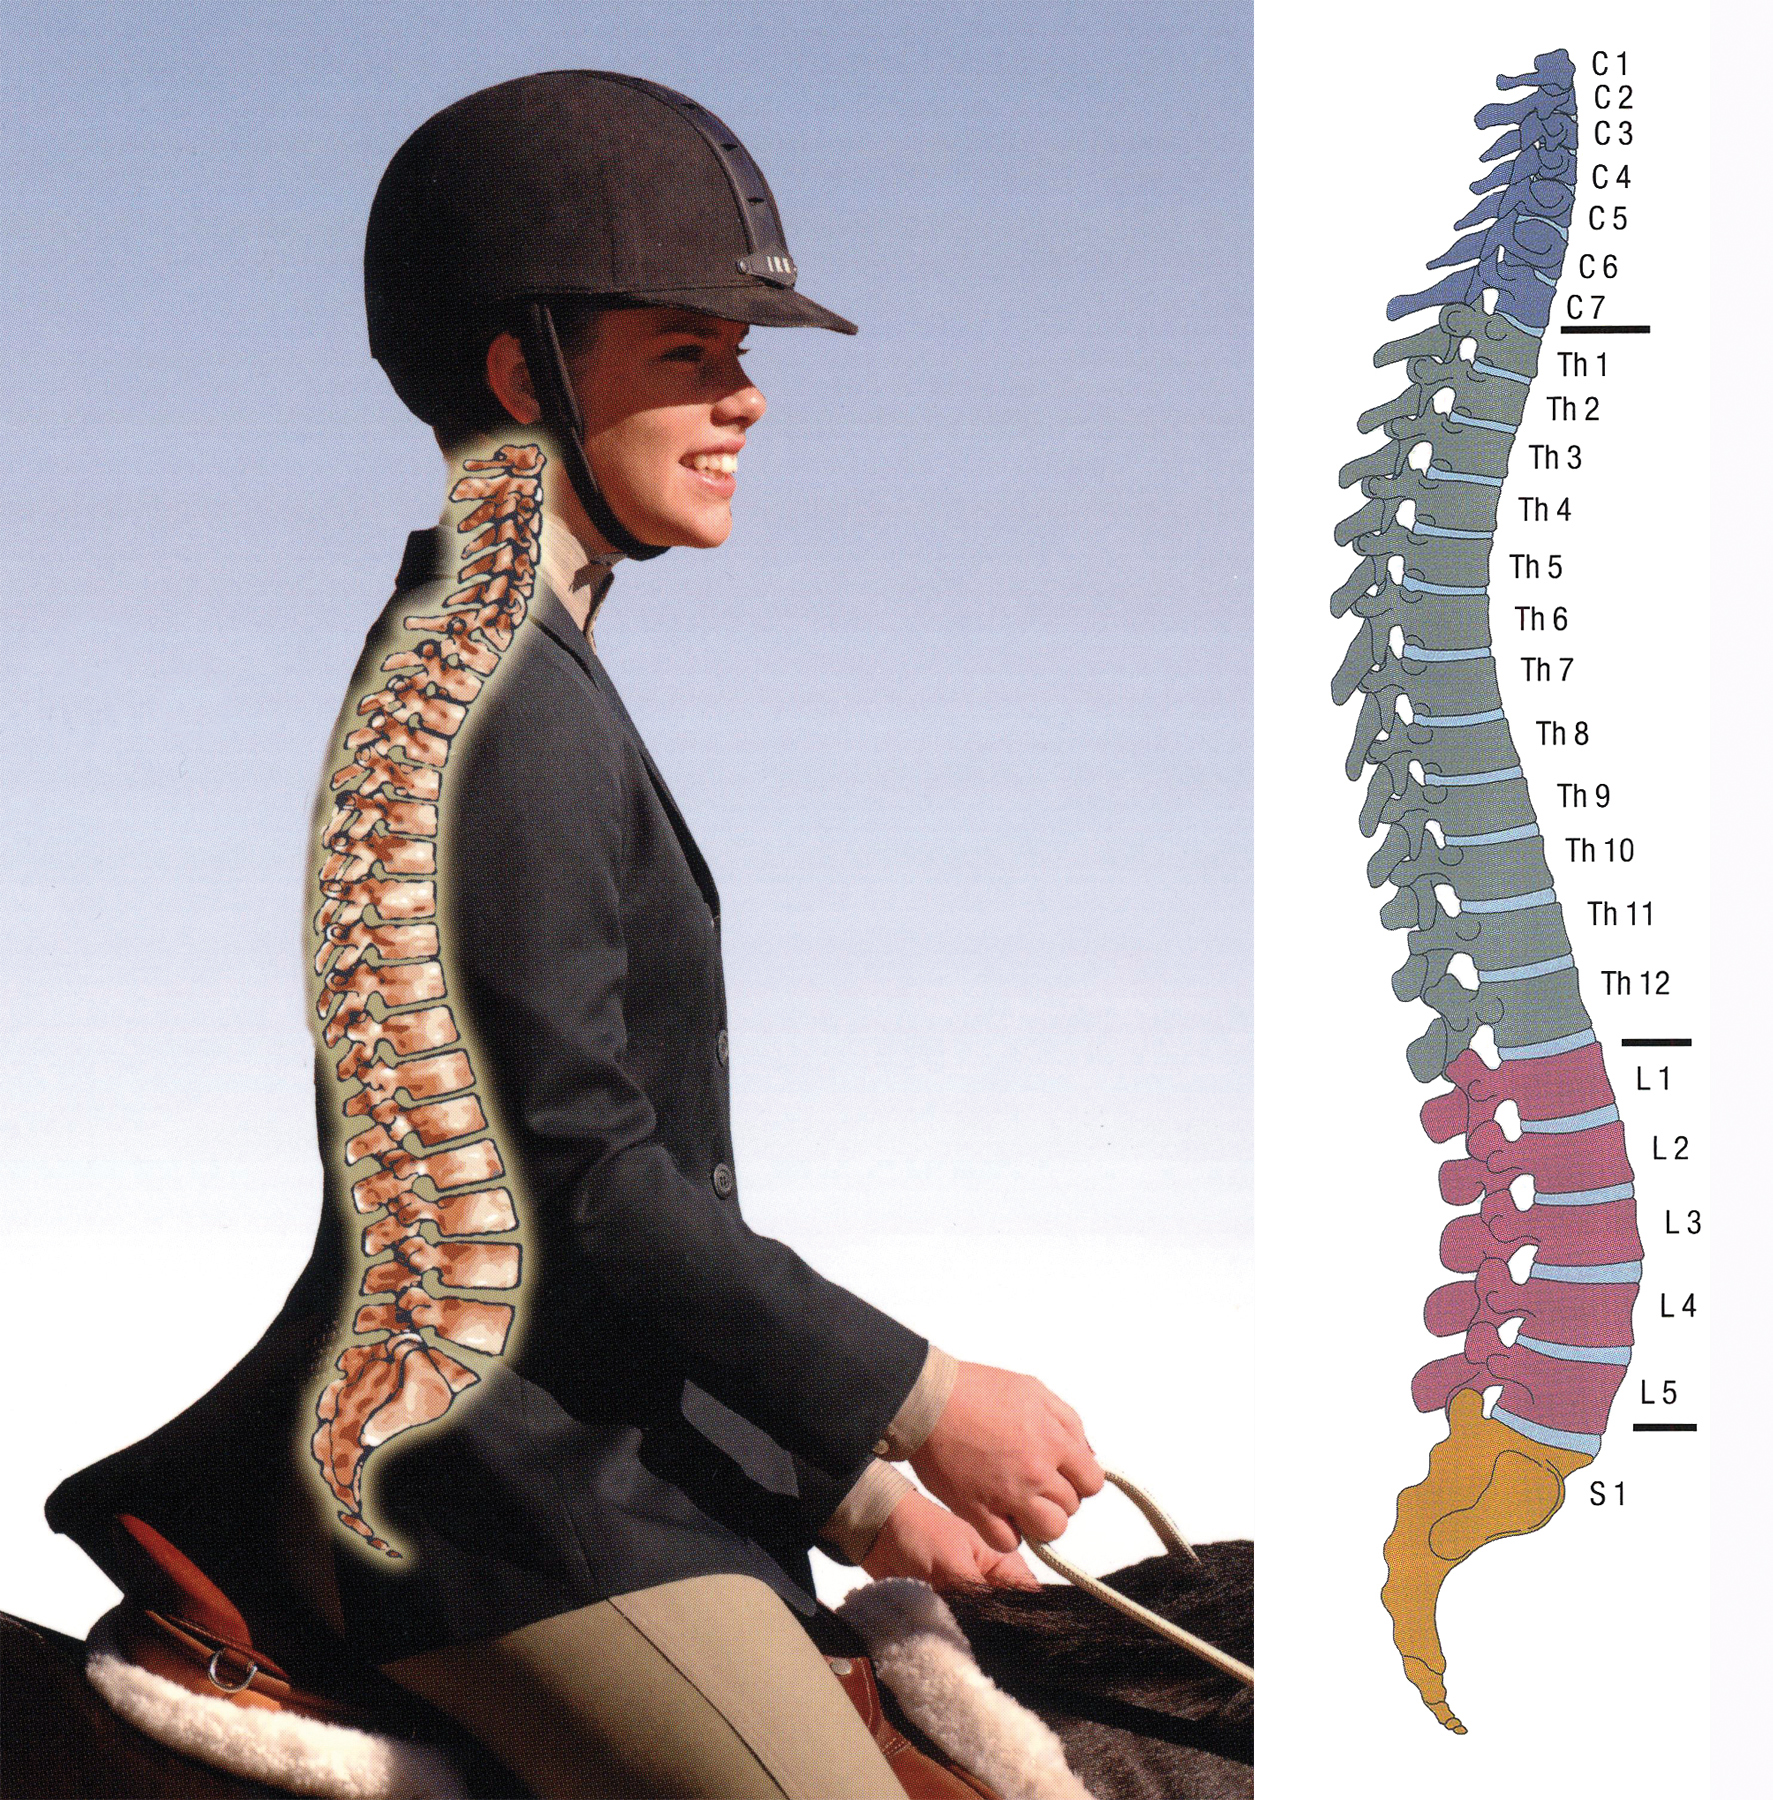
The horse will be much more comfortable in a well balanced saddle, because the weight of the rider will be distributed over a larger area. The saddle will not be driven into the shoulder or back on the loin. With correct balance the rider will also be able to use the 4 curves in her back as natural ‘shock absorbers’, and she will sit balanced on her seat bones. This good posture means she will be able to lean forward and backward without the lower or upper leg swinging back and forth while riding.
Wither Clearance – Tip 2
Wither clearance is an often misunderstood concept, and absolutely bears repetition. All of us are concerned that our saddles have adequate wither clearance and do not pinch our horse’s withers. But few of us truly understand exactly what “wither clearance” means; I have discussed this topic previously but I think it is so important that it is worth telling you about again.
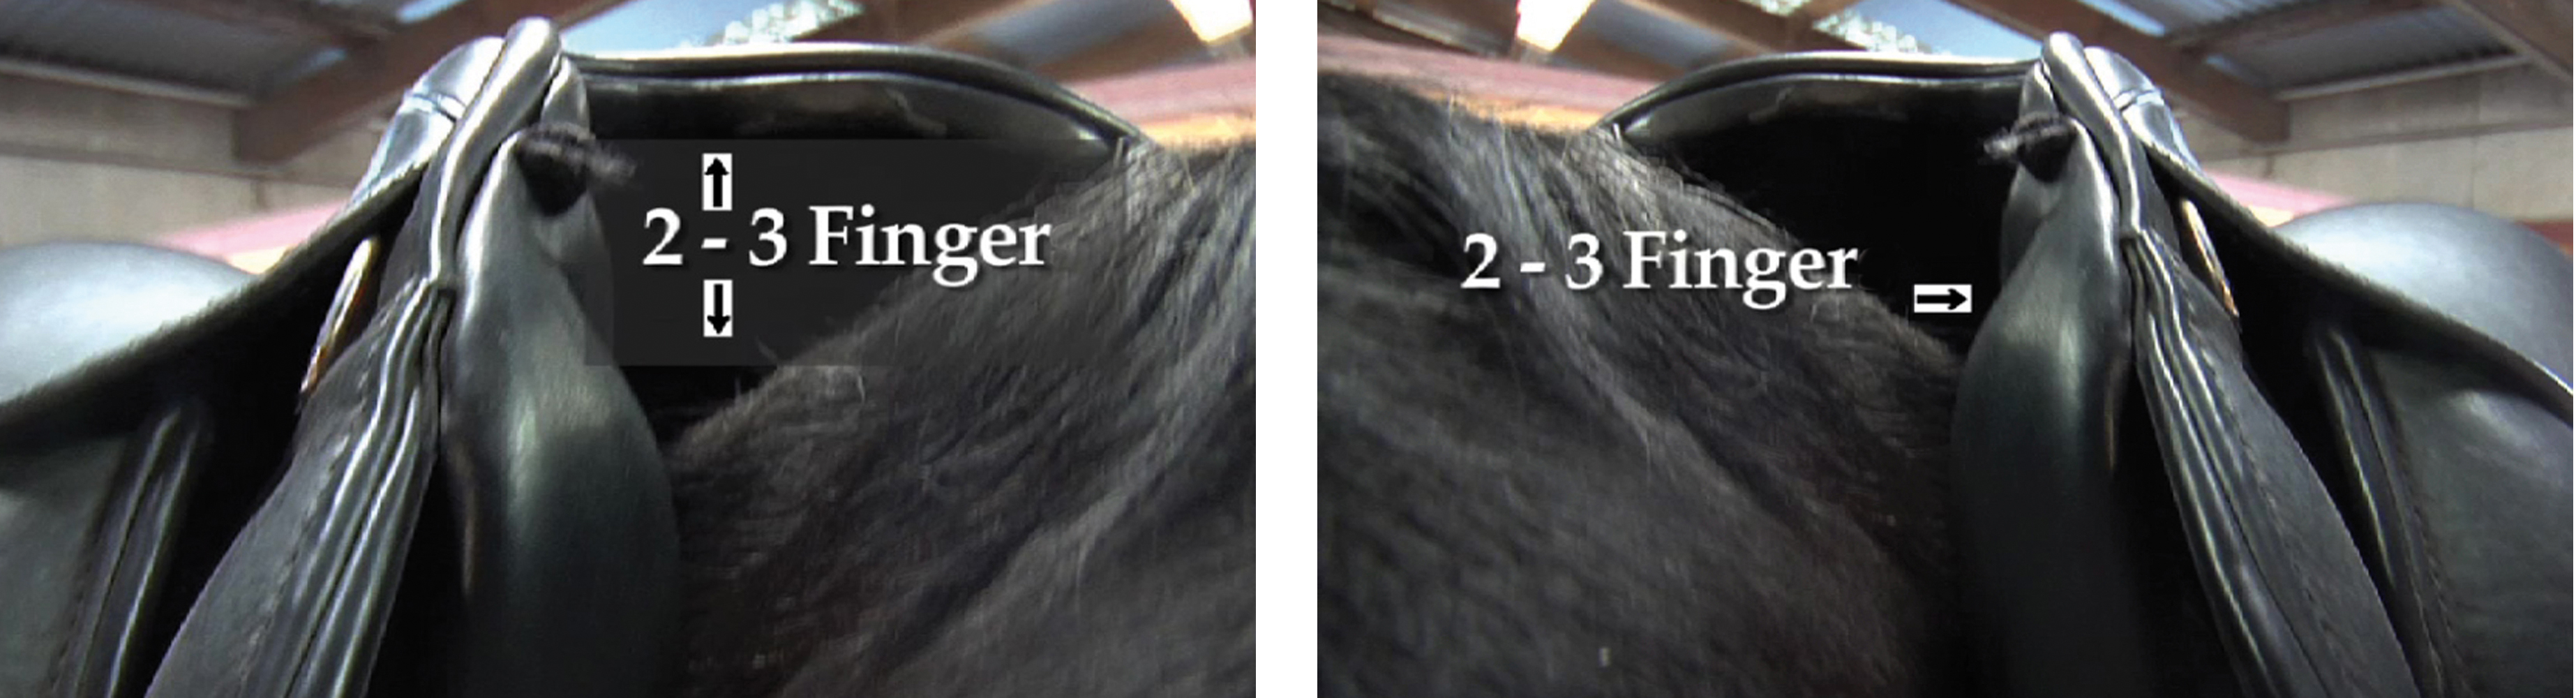
Many of us learned in Pony Club that our saddle should have 2-3 fingers clearance on the top of the withers. But we were never taught that there also had to be clearance on the sides of the withers. One of the reasons this is crucial is because when the horse moves, his shoulder blades rotate upwards and backwards. The saddle must have an opening (clearance) on the sides of his withers to accommodate the shoulder rotation.
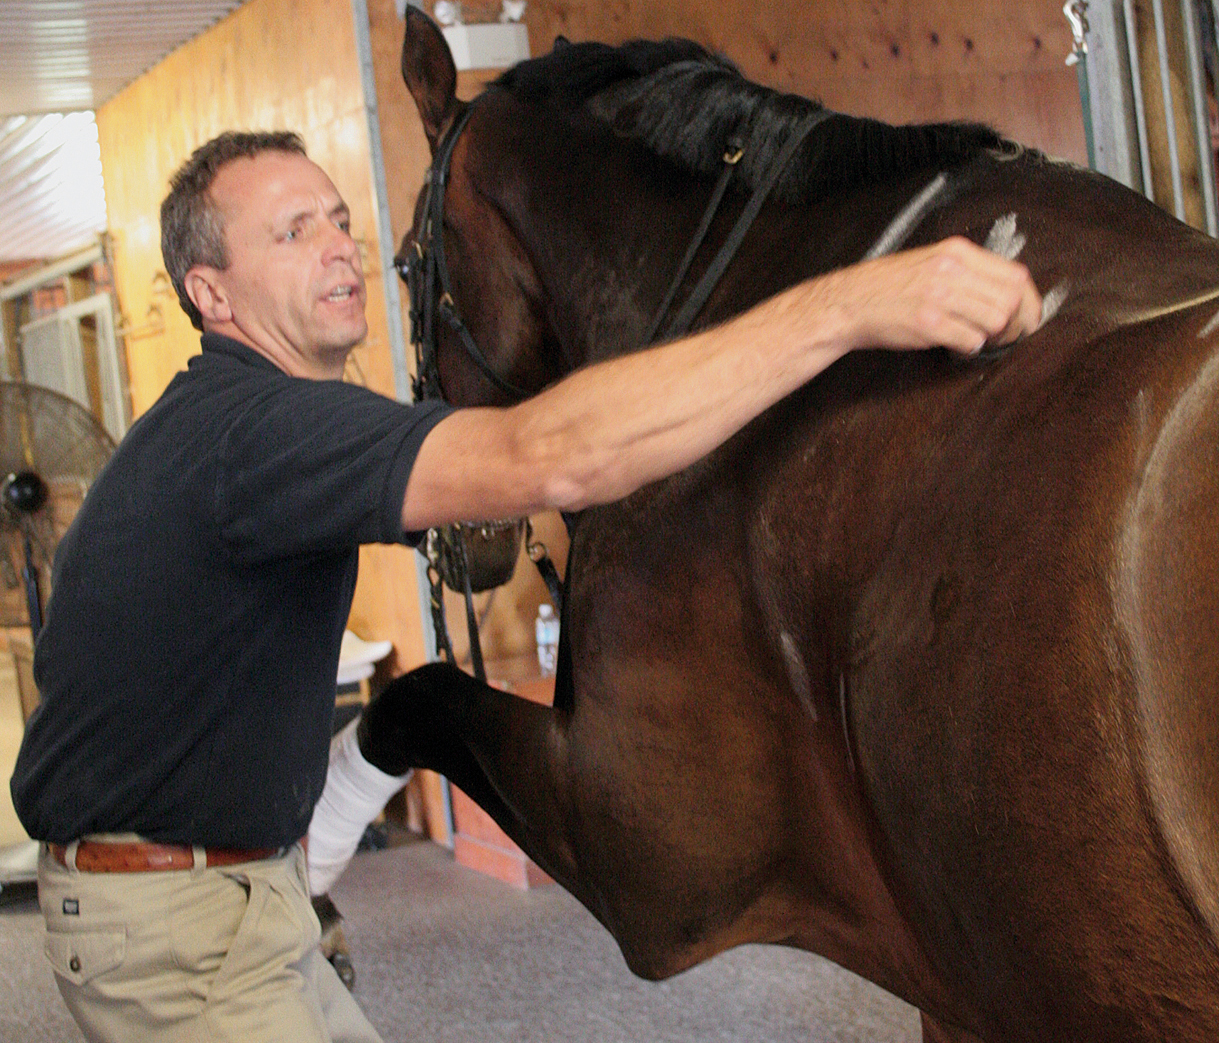
To see just how much your own horse’s shoulder blade rotates backwards when he moves, stand on the side of your horse and mark the shoulder blade with a piece of chalk. Then have a friend stretch your horse’s front leg forward and mark the new position of the shoulder blade. You will see how much farther back the shoulder blade is now positioned.
Ideally, we should be able to get 2-3 fingers clearance on both the top and the sides of the withers. To determine adequate clearance on the sides of the withers, we measure from the point just above where the stuffing of the saddle starts. On a mutton-withered horse, however, we may get as much as 4-5 fingers clearance.
If there is no clearance (or space) on the side of the withers, the horse’s movement will be restricted. It will be impossible for him to have free range of movement through his shoulders.
A horse whose saddle pinches his withers may be reluctant to go forward. Other more extreme signs of insufficient wither clearance are patches of white hairs (not scattered individual white hairs) or sores on the top or on one or both sides of the withers.
©2016 Saddlefit 4 Life® All Rights Reserved