The Nine Points of Saddle Fit
As we head into spring, it’s time to put our thoughts into ensuring that all of our tack and equipment will work for the upcoming training months, and for the shows we intend to compete in. Especially if your horse has been ‘laid off’ for the winter months you will need to ensure that the saddle is fitted properly to allow him comfort and freedom to muscle up again when you begin training in earnest. While it can take four weeks for a muscle to build up with consistent training, it takes only one week for the muscle to regain its original shape (which is negative development). Thus, even if you have given your horse just a week off from training, you will find that your saddle may not fit the way it did and the way it should, so that you should have a diagnostic evaluation done and the saddle adjusted by a certified fitter before you begin training again.
A quick diagnostic can be done using our 9 points of saddle fit evaluation (with videos available to show you how at our YouTube channel at www.youtube.com/mjpschleese). Below are very brief points that I will go into more detail on over the next couple of weeks in this blog, as I strongly feel that this information cannot be repeated often enough and is truly evergreen.
1. Saddle Balance
A saddle too high in the pommel and too low in the cantle causes pressure on the horse’s back. It will be very difficult for your horse to engage his back because too much of your weight is on his last 2 floating ribs.
If your saddle is too low in the front it will pinch into the horse’s shoulder – which is very restrictive for your horse. Your saddle is too high in the back so your leg goes forward and you fall into a chair seat to balance which can strain the discs in your lower back. It should sit so that the pommel and cantle are even.
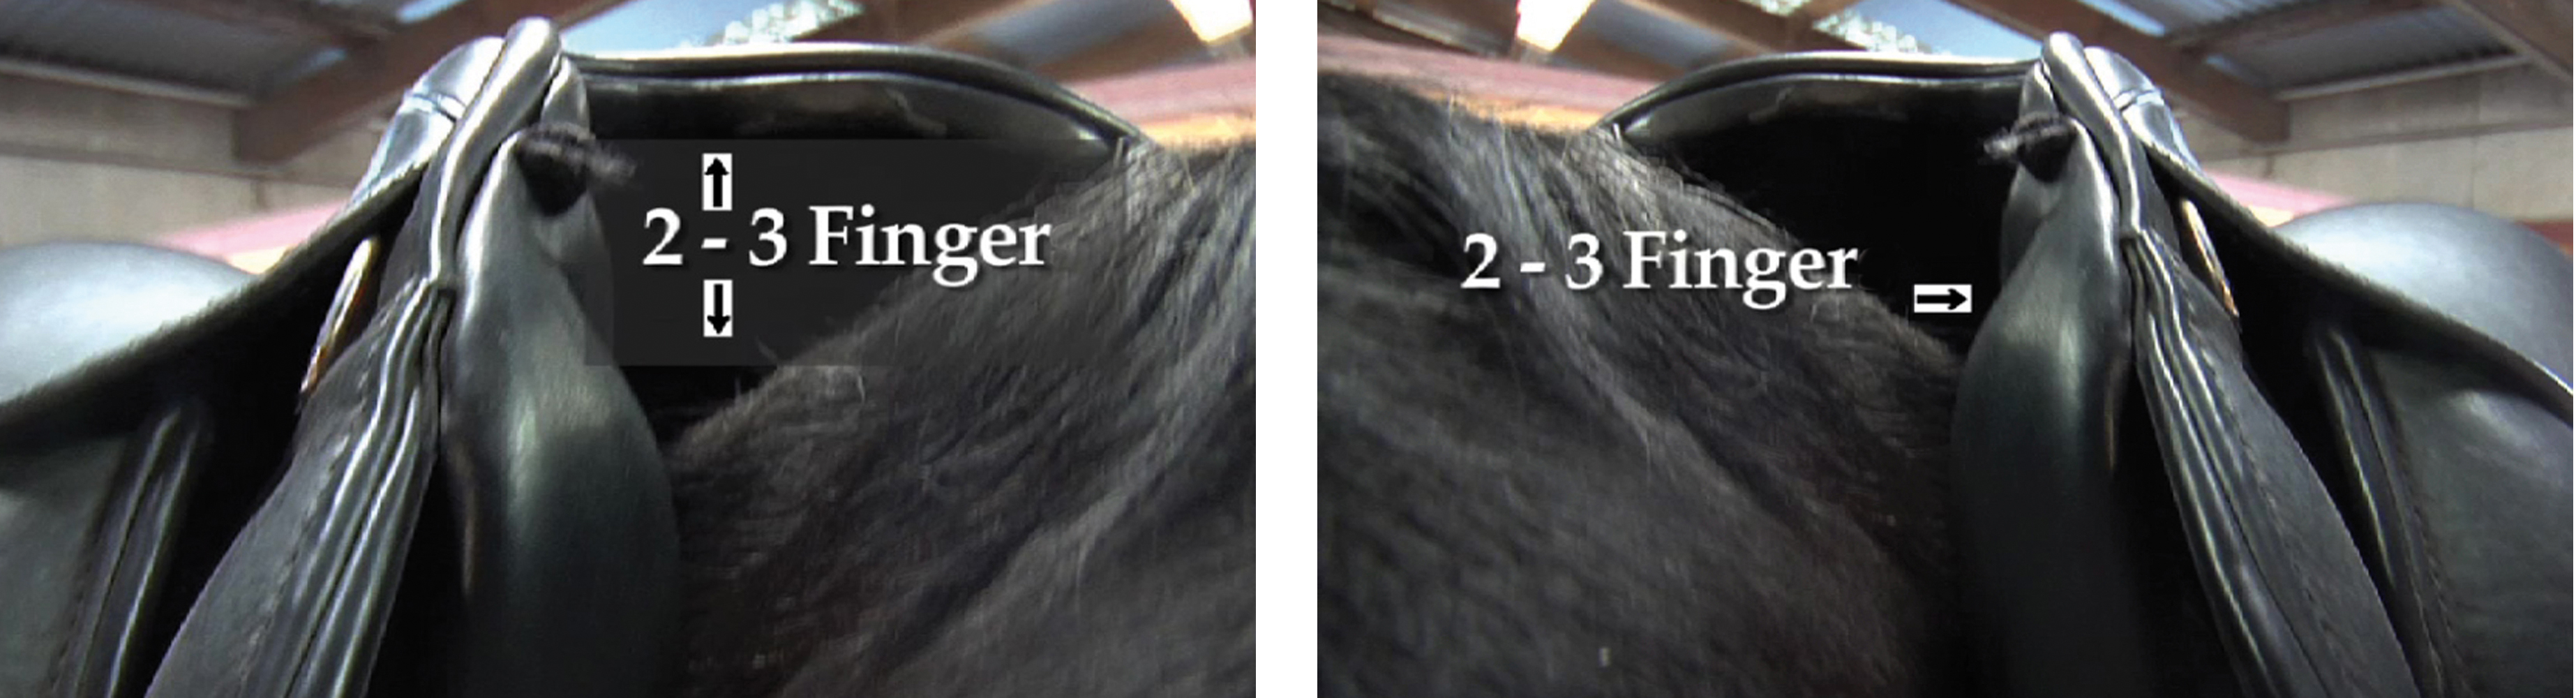
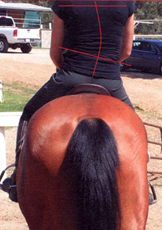
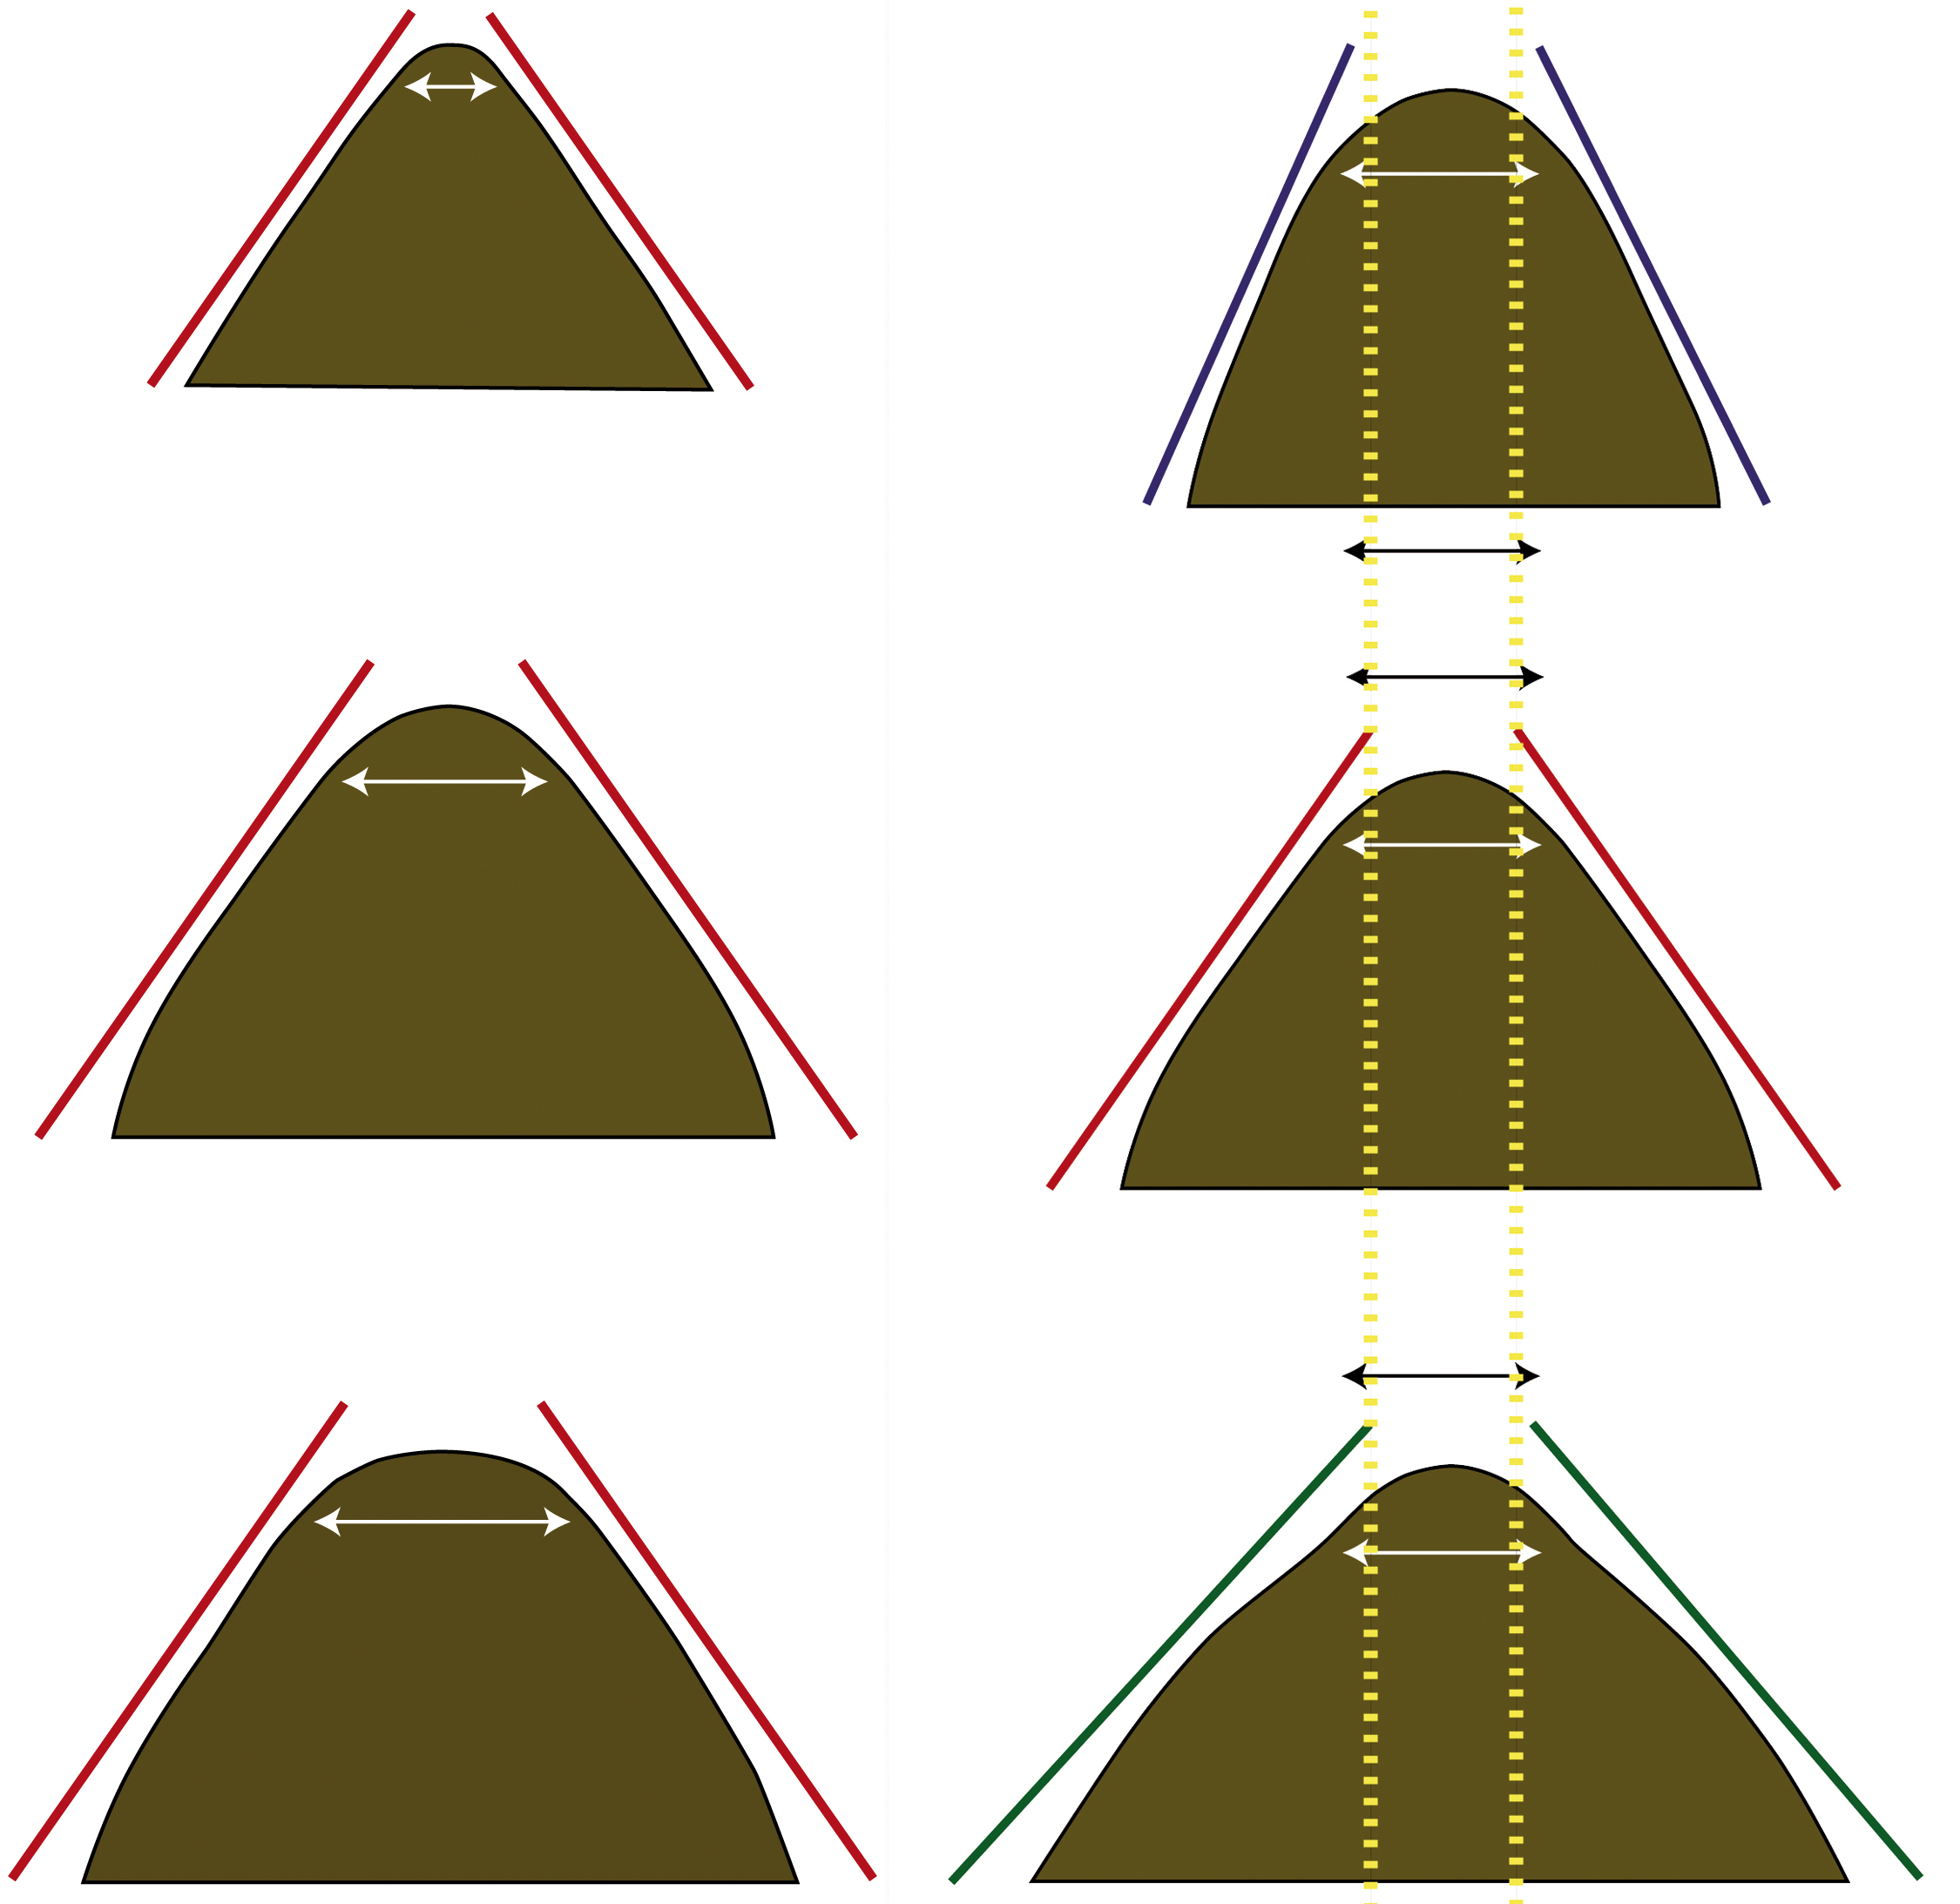
2. Wither Clearance
The saddle should have 2-3 fingers clearance on the top and around the side of the withers. The saddle must have be an opening (clearance) on the sides of his withers to accommodate the shoulder rotation upwards and backwards during movement.
A horse whose saddle pinches his withers may be reluctant to go forward. Other more extreme signs of insufficient wither clearance are patches of white hairs (not scattered individual white hairs) or sores on the top or on one or both sides of the withers.
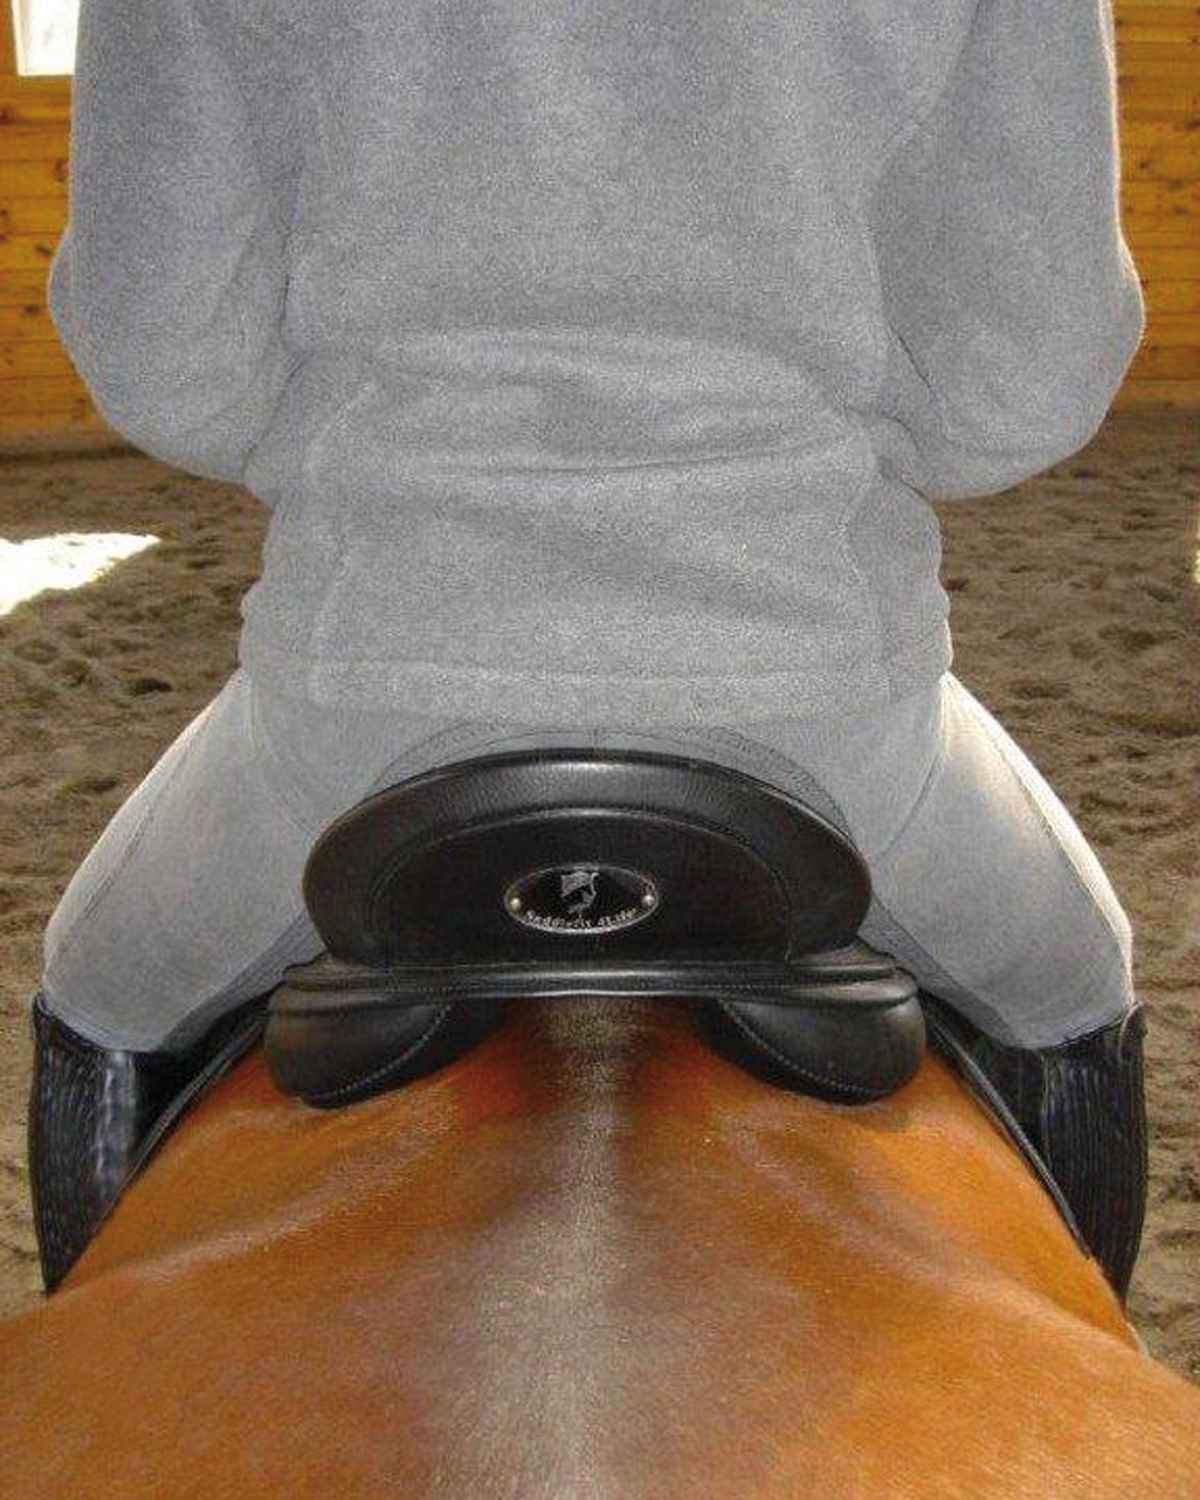
3. Channel/Gullet Width
A saddle with a channel or gullet that is too narrow or too wide can cause permanent damage to your horse’s back. The width of each horse’s spine will determine how wide his saddle’s gullet must be, and it must be the same throughout the entire length of the saddle.
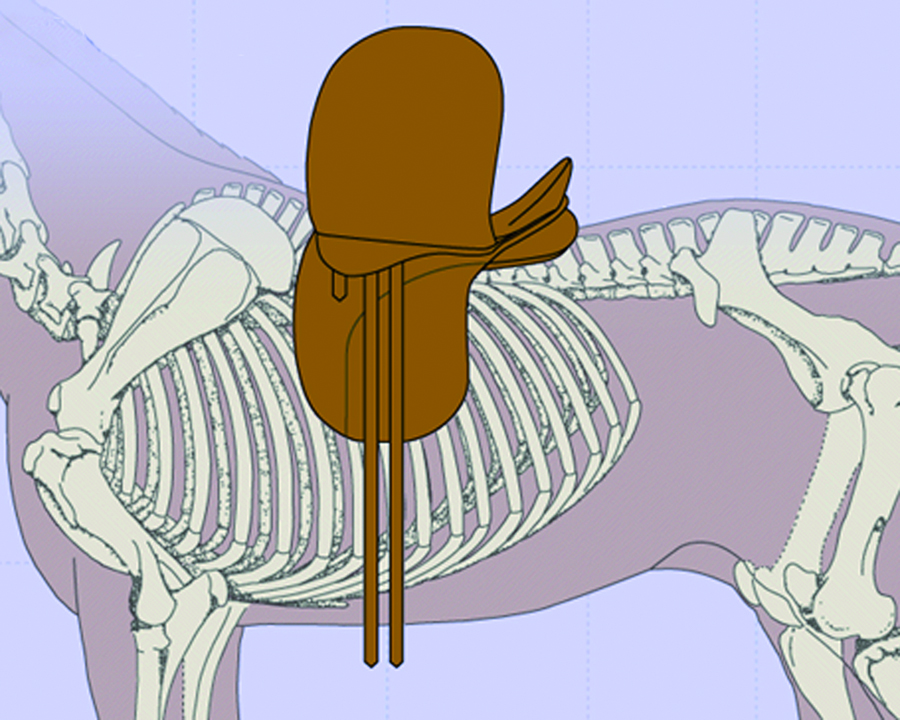
4. Full Panel Contact
Ensure that your saddle’s panels make even contact with your horse’s back all the way down to distribute the rider’s weight over an area that equals approximately 220 square inches and ends at the last rib. Ensure that it doesn’t bridge or rocks (contact only in the middle.)

5. Billet Alignment
Billets should hang perpendicular to the ground in the girth area. If the billets hang too far back, gravity will pull the billets (and the saddle) forward into the girth area. The girth will always find its position at the narrowest point of the rib cage, driving the saddle forward onto your horse’s shoulders.
If the billets hang too far forward into your horse’s elbow area, they may make him sore in the elbows. Gravity will drag them (and the girth and saddle along with them) back into the girth area. There will now be too much pressure on the panels at the rear of the saddle.
6. Saddle Straightness
Straightness means that the center of the saddle is in alignment with your horse’s spine. Horses are by nature uneven. Most horses have a left shoulder that is larger and more developed than their right shoulder. The larger shoulder kicks the saddle over to the other side during motion.
A rider who sits unevenly can compress the stuffing more on one side of the saddle, and drag it over to that side.
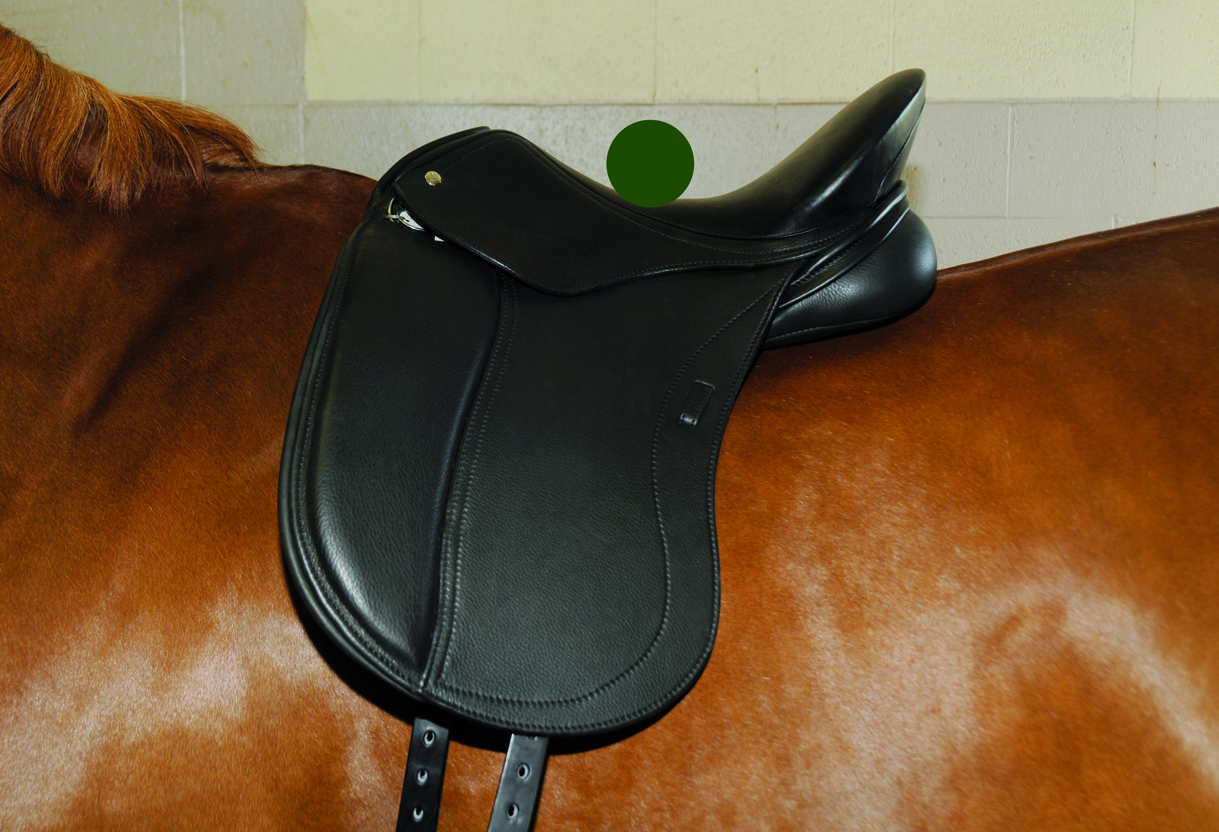
7. Saddle Length (see image #5 above)
The length of the saddle support area will determine how long the panels must be.
The saddle must sit behind the shoulder. A saddle that is too long often will get driven forward into the shoulder. The saddle cannot extend past the last floating rib at the 18th thoracic vertebra.
8. Tree Angle
The angle of the tree (at the tree points for the gullet plate) must be adjusted to match the angle of the horse’s shoulder. As the horse moves, his shoulder rotates upward and backwards. Check if the angle of the piping on the saddle matches the angle of your horse’s shoulder. If it does, the angle of your saddle’s tree is correctly adjusted for your horse.
9. Tree Width
The tree width at the gullet plate must be wide enough for the horse’s shoulders to rotate freely under the tree.
If the tree width is too wide, the entire saddle may rock or slip from side to side when it’s being ridden, or the back half of the saddle may twist to one side or the other.
Tree width and tree angle need to be adjusted together. Adding flocking to or removing flocking from the vertical panels of the saddle will not solve the problem – it is the gullet plate that needs to be adjusted. Some of the self-adjustable gullet plates will accommodate angle adjustment, but will not allow width adjustment (over the wither area).
Hopefully these basic tips will help you get ready for a successful show season while ensuring your horse has the freedom to perform at its potential!
Happy Riding!
©2016 Saddlefit 4 Life. All Rights Reserved